Pages

Showing posts with label cooking. Show all posts

Wednesday, August 7, 2013

Gan Gan's Cream Cheese Mints

Gan Gan was my Mom's mom. I loved her like crazy. She was spunky, and kind, and absolutely hilarious. As a little girl, I loved spending time with "Gan Gan." I didn't get the chance to know her as an adult (she passed away when I was in middle school). She didn't cook very much (that I remember), but it was always fun to help her in the kitchen! (As a side note, I found out recently that she was also adopted...and her adoption story is SO interesting!)

When I was trying to decide what recipe to post, I looked through a few that she had passed down - Chocolate Pie, Lemon Pie, Bourbon Balls (interesting). But I landed on Cream Cheese Mints.

These are kind of old-fashioned. Not something I really make very often - in fact I've only made them once or twice as an adult. Though I do remember having them at "teas" and "luncheons" and other various fancy parties when growing up.

They are basically mint-flavored icing candies. Yum. Super simple. A few ingredients (some of which you can leave out - namely food color). These are really fun for small kids to help with - because it's kind of like working with play dough and there are no sharp or hot objects involved. Enjoy!

Gan Gan's Cream Cheese Mints

yield 6-7 dozen

Ingredients

  • 3 oz cream cheese, softened
  • 1/2 tsp. liquid peppermint flavoring
  • 2-2 1/2 cups powdered sugar
  • food color (optional)
  • granulated sugar for decoration

Mix 1 package cream cheese (softened) with 1/2 tsp. peppermint flavoring. Gradually add 2-2 1/2 cups powdered sugar. Knead until no longer sticky. Divide into 4 portions and add food coloring of your choice to each (optional).

Shape into 3/4" balls and roll in sugar. Flatten with a fork to create a pattern. Let dry at room temperature.

Store loosely covered in the refrigerator.


PS - I didn't have time to take pictures this month (sorry!). And yes - It's August 7 and I'm just now posting for July. Can you say slacker?!? I will try to be better next month! I did post a couple of other non-grandmother recipes over on my photography blog...watermelon sorbet & my favorite popsicles.

Saturday, June 29, 2013

Blueberry Crisp


This is adapted from Shauna Niequist's Bread and Wine: A Love Letter to Life Around the Table with Recipes. I originally made this as a dessert, but it was even better for breakfast! Add a little Greek yogurt and a really great cup of coffee and you are all set! 

Ingredients: 

4 cups blueberries

Crisp topping:
1 cup old fashioned oats
1/2 cup raw pecans, halved or chopped
1/2 cup almond meal (put a handful of almonds in your coffee grinder and pulse until it is a fine meal, but before it turns to almond butter)
1/4 cup maple syrup
1/4 cup olive oil
1/2 teaspoon salt

Instructions: 

Mix together the crisp ingredients
Pour the berries into an 8x8 pan, and then layer the crisp topping over it. 
Bake at 350 degrees 35-40 minutes or up to 10 minutes longer (if using frozen fruit), until fruit is bubbling and topping is crisp and golden. 


Thursday, June 27, 2013

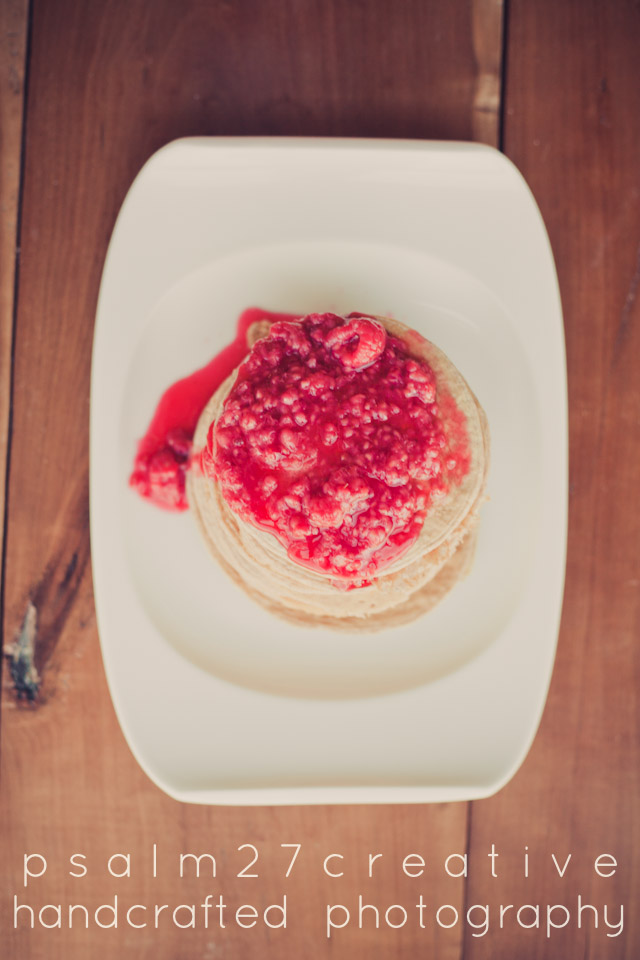
Whole Wheat Pancakes with Fruit Compote


Breakfast is probably my favorite meal to eat and to cook. I mean, for most meals it would be considered wrong to have a pastry topped with sugar and icing as the main dish, but for breakfast...fair game! There are just so many amazing things you can make for breakfast - egg dishes, sweet treats, savory-sweet combos (my favorite). I LOVE it!

During the week we have (really) healthy breakfasts - mostly fruit & spinach smoothies (it's not as scary as it sounds...I promise!). So on the weekends, the hubby and I always try to make time for at least one sit-down, cooked breakfast together as a treat. I love cooking adventures and trying new recipes for breakfast (most of which tend to be not-so-healthy). But on Saturday mornings that are a bit busier, we usually resort to the old standby...pancakes.


I started with my mother-in-law's pancake recipe - which is fantastic! And then, as we were working on eating healthier, I started swapping out and adding ingredients...all-purpose flour for whole wheat flour, a spoonful of flax, etc. And then one Saturday it happened. No milk. And of course I was already half way through making the pancakes. Luckily we had some almond milk (for those spinach smoothies I mentioned before), and I figured it was worth a try. It turned out so great that the hubby said the pancakes were even better than the not-so-healthy ones. So I wrote the "recipe" down, and that's what we've been using since.

Of course we can't just eat the pancakes plain. Who does that?!? We usually top them in maple syrup. Sometimes I even make homemade "pretend" maple syrup. But in an effort to make the pancakes even healthier, I started making a fruit compote. It's quick, easy, and you can use whatever fruit you have on hand - even something that's a bit over-ripe will work. Enjoy!


Whole Wheat Pancakes

makes about 7-8 medium pancakes

Ingredients

  • 1 cup whole wheat flour
  • 2 1/4 tsp baking powder
  • 1/4 tsp salt
  • 1 tsp cinnamon (or more if you like!)
  • 1 tsp sugar (or agave or sugar substitute)
  • 1 Tbsp melted butter (can substitute veggie oil or coconut oil) - optional
  • 1 heaping Tbsp ground flax
  • 1 egg
  • 1 cup + 2 Tbsp almond milk
  • 1 tsp vanilla
  • nonstick spray, butter, or oil to grease pan - optional

Heat griddle or frying pan over medium heat.
Mix dry ingredients. Add wet ingredients, and mix until there are no dry spots (be careful not to over mix!).

If you are using a nonstick pan or griddle, you shouldn't need to grease the pan. If not, once pancake batter is ready, spray griddle or pan with nonstick spray. Pour about 1/4 cup mix for each pancake. Cook until bubbles begin to appear on surface. Flip and cook on the other side for a couple of minutes. Super quick & easy!

Serve with syrup or compote (recipe below).


Fruit Compote

Makes enough to use with 3-4 batches of pancakes. Store in refrigerator.

Ingredients

  • 2-3 cups fruit (peeled & diced) - berries work great, or peaches, or apples
  • 4 Tbsp sugar -add more or less depending on how sweet your fruit is
  • 4 Tbsp water
  • 1 Tbsp lemon juice
  • 1 1/2 tsp vanilla


In a small saucepan, place fruit, sugar, water, and lemon juice. Bring to a boil over medium-high heat. Stir constantly until berries burst. Reduce heat and allow to simmer over medium-low, stirring occasionally for about 10 minutes. Remove from heat and add vanilla. Serve warm, or refrigerate for use later.


Friday, May 31, 2013

Lasagna- Style Baked Ziti with a Twist

(adapted from Real Simple Magazine)


12 oz. ziti (about 4 cups) [Use 1 box of whole wheat penne.]
1 TB olive oil
1 large onion, chopped
2 cloves garlic, finely chopped [Use the garlic press and 4-5 cloves of garlic.]
½ pound lean ground beef [Since I don’t eat a lot of red meat, I will use ground turkey.]
1 26 oz. jar of marinara sauce
1 bunch spinach, thick stems removed (about 4 cups) [1 bag of spinach.]
½ cup ricotta
½ cup grated Parmesan (2 oz.) [ Double.]
1 cup grated mozzarella (4 oz.) [Double.]

[If you prefer, substitute Italian or turkey sausage for the ground beef or chopped broccoli for the spinach.]

Heat oven to 400 degrees F. Cook the pasta according to the package directions. Drain the pasta and return to the pot.

Meanwhile, heat the oil in a large skillet over medium heat. Add the onion and garlic and cook, stirring occasionally, until they begin to soften, 4-5 minutes. (Probably more like 10 minutes.) Add the beef/turkey, a dash of salt and pepper, and cook, breaking up the meat with a spoon until its no longer pink, 5-6 minutes more.

Toss the pasta with the meat mixture, marinara sauce, spinach, ricotta, and ¼ cup of the Parmesan. Transfer to a 9x13-baking dish or 4 large ramekins. Sprinkle with mozzarella and the remaining Parmesan and bake until the cheese melts, 12-15 minutes.


Thursday, May 30, 2013

Making Fresh Pasta: Spicy Tagliatelle with Thyme


I am new to this whole homemade pasta thing. My sweet husband gave me the kitchen aid pasta maker attachments for Christmas. What I've learned? Making homemade pasta takes time and practice. It is most definitely a labor of love. Thus I consider homemade pasta a weekend or special occasion meal.

The first time I tried to make to make homemade pasta it went horribly wrong. First of all, I was cooking for friends. It was Sunday brunch after church (a little tradition we've started in the Guillory house). And we were all starving. The recipe said it would take 40 minutes. And I believed it. Whoops! Oh, and did I mention I decided to make spinach pasta on my first try? Yeah. Because I am me. The pasta was the wrong consistency (which I only know in hindsight). It stuck in the pasta rollers, clumped together, and ended up very thick & chewy. Mmmmm.

At this point I was thinking homemade pasta was totally not worth the effort. Until my sweet husband made a sad face, and I gave it a second try. And it was so much better. Since then I have made this recipe a couple of times, and filled pasta once. It's a really fun project, but still one that takes time. And while the pasta roller is definitely a handy accessory, it's totally possible to make without one (come on Emily...you know you want to give it a try!)

This recipe of spicy tagliatelle goes very well with the creamy eggplant sauce, but the pasta recipe can be adapted very simply by switching out the chilies & thyme for your favorite herb/seasoning, or can be topped with pretty much any type of pasta sauce. The possibilities are endless! 

Spicy Tagliatelle


Ingredients

  • 2 2/3 cups all-purpose flour
  • 4 large eggs
  • 2 dried chilies, crumbled
  • 1 tsp finely chopped fresh thyme


Making the Pasta Dough


  • Whisk eggs, chilies & thyme in a small bowl.  
  • Sift flour into a medium bowl & make a well in the middle. 


  • Pour egg mixture into flour. 
  • Use a fork to gradually incorporate egg into flour to make a crumbly dough. (I have tried skipping this step...I do not recommend this ;) It will look something like this...
  • Knead the dough for a few minutes . It will be a very thick dough, and should not be sticky!  
  • Allow the dough to rest for 30 minutes or store it in the fridge (wrapped in plastic wrap) until you are ready to roll it out.


Rolling the Pasta Dough

(This is where a pasta roller comes in handy!)

If using a pasta machine:

  • Cut the ball of dough into about 6 smaller pieces. 
  • Taking one piece at a time, brush the dough with flour.
  •  Roll each piece of dough through on widest setting. Fold in half. Run through a second time. Brush with flour & set aside until you've completed rolling all six.
  • Switch to next narrower setting - run dough through 1 sheet at a time. Brush with Flour. At this point the pieces maybe getting quite long. If so, you may want to cut each in half.
  • Repeat making sheets of dough thinner until you reach the desired thickness. (I rolled through 3 settings.)

OR

If rolling by hand:

  • Cut the ball of dough into several smaller pieces. 
  • On a floured surface, roll out each piece of dough to desired thickness, brushing with flour along the way.
*Tip: Keep dough generously floured throughout the rolling & cutting process. This keeps the sheets of pasta from sticking to one another.

Allow sheets of pasta to rest for about 15 minutes before cutting.


Cutting the Pasta Dough

This particulate recipe calls for the pasta to be cut as tagliatelle - but feel free together creative with your pasta shapes!

If using a pasta machine:

  • Switch to the desired cutting roller.
  • Be sure that pasta sheets are floured & not sticking together. 
  • Run pasta sheets through cutter one at a time.
  • As pasta is extruded, gather noodles gently in your hand. 
  • Place pasta on cookie sheet, separating strands as you go.

If cutting by hand:

  • On a floured surface, place a sheet of pasta dough.
  • Cut using a sharp knife into desired shape.


Cooking Fresh Pasta

Fresh pasta cooks very quickly. Be sure not to overcook or it will get chewy!
  • Boil in a large pot of boiling water for 3-4 minutes.
  • Drain. 
  • Top with Creamy Eggplant Sauce or other pasta sauce as desired.
  • Serve & enjoy!


Storing Fresh Pasta

Unless you're cooking for a crowd, this recipe will make enough pasta for at least 2 meals. It says it serves 4, but in my experience it is 4 large very filling servings. I like to freeze half of the pasta and half of the sauce for a quick & easy weeknight meal. 

  • Gather strands of pasta into several small "nests" and place on a cookie sheet.
  • Cover & place in freezer.
  • In about an hour, remove from freezer, place pasta nests in a ziplock baggie, and toss back into the freezer. 
  • When you are ready to cook your frozen pasta, boil in salted water for 4 minutes.  

Enjoy!